ADVERTISEMENT
No Need to Scrub: Just Put the Oven Rack in a Bag and It Will Be as Good as New
Cleaning the oven is one of those household chores that almost everyone dreads. It’s time-consuming, physically demanding, and often feels like a losing battle against baked-on grease, carbon buildup, and stubborn stains. But among all the grimy parts of the oven, oven racks are arguably the worst offenders. They’re large, awkward to handle, and notoriously difficult to clean without hours of scrubbing.
What if there were a way to clean oven racks without scrubbing at all?
Good news: there is.
With a simple household item—a bag—and a little patience, you can restore your oven racks to a nearly brand-new condition. This method is surprisingly effective, inexpensive, and far less exhausting than traditional cleaning techniques. In this article, we’ll explore why oven racks get so dirty, why scrubbing doesn’t work as well as you think, and how the bag method works step by step. We’ll also cover variations of the method, safety tips, common mistakes, and why this hack has become a favorite among cleaning enthusiasts.
Let’s dive in.
Why Oven Racks Are So Hard to Clean
Before we get into the solution, it helps to understand the problem.
- Grease Bakes Onto the Metal
Every time you roast vegetables, bake pizza, or cook a casserole, tiny droplets of grease and food particles become airborne inside your oven. These particles eventually settle on the oven racks. At high temperatures, grease doesn’t just sit there—it polymerizes, forming a hard, sticky layer that bonds tightly to the metal.
- Carbonized Food Residue
Spills and splatters that fall onto oven racks are exposed directly to intense heat. Over time, they carbonize, turning into black, crusty residue that resists soap and water.
- The Shape Works Against You
Oven racks have grooves, bars, and corners that make them difficult to clean thoroughly. Even if you scrub the flat surfaces, grime often hides in the joints and intersections.
- Scrubbing Can Damage the Finish
Using steel wool or harsh abrasives might remove grime, but it can also scratch the rack’s coating. This damage makes future buildup worse and may even lead to rust.
So if scrubbing is exhausting, ineffective, and potentially damaging—what’s the alternative?
The Genius of the “Bag Method”
The bag method works on a simple principle: let chemistry do the work for you.
Instead of scrubbing grime away manually, this method uses a cleaning agent trapped inside a sealed bag to break down grease and carbon over time. The enclosed environment prevents the cleaner from drying out and allows it to work at full strength.
The result? Grime loosens and slides off with minimal effort.
What You’ll Need
The beauty of this method is its simplicity. You likely already have most of these items at home.
Basic Supplies:
A large, heavy-duty plastic bag (garbage bag or oven rack–sized zip bag)
Ammonia or an alternative cleaner (we’ll cover options)
Rubber gloves
A well-ventilated area (garage, balcony, or outdoors)
Warm water
A sponge or cloth (for light wiping, not scrubbing)
The Classic Method: Oven Racks + Ammonia in a Bag
This is the most well-known and effective version of the bag trick.
Step 1: Choose the Right Location
Ammonia has strong fumes, so this method should be done outside, in a garage, or near an open window. Never do this in a closed indoor space.
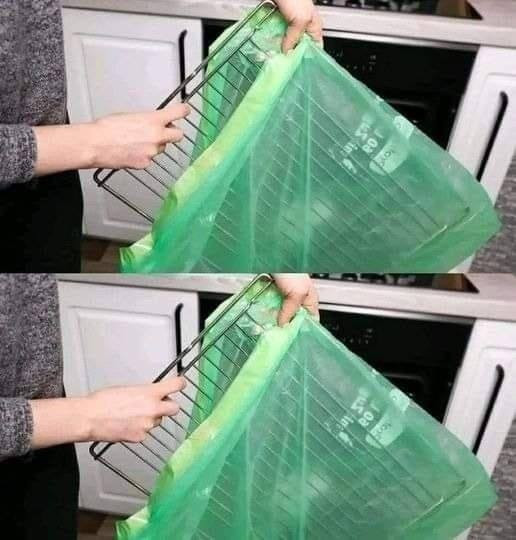
Step 2: Place the Rack in the Bag
Lay the oven rack flat inside a large plastic bag. Make sure the bag is thick enough not to tear.
Step 3: Add Ammonia (No Mixing!)
Pour about ½ to 1 cup of household ammonia into the bag.
Important: The rack does not need to be submerged. The fumes do the work.
Step 4: Seal the Bag Tightly
Tie the bag securely so no fumes escape. This sealed environment is key.
Step 5: Wait
Leave the bag sealed for 8–12 hours, or overnight. During this time, the ammonia fumes break down grease and carbon deposits.
Step 6: Rinse and Wipe
Put on gloves, open the bag carefully, and remove the rack. Rinse it thoroughly with warm water. Most grime will slide off effortlessly. Any remaining residue can be wiped away with a sponge.
Step 7: Dry and Replace
Dry the rack completely before placing it back in the oven.
That’s it. No scrubbing. No sore arms. No frustration.
Why This Method Works So Well
The success of the bag method lies in chemical reaction and containment.
Ammonia fumes break down grease at a molecular level.
The sealed bag prevents evaporation, keeping the cleaner active.
Time replaces physical effort.
In other words, you’re letting science do the heavy lifting.
Don’t Want to Use Ammonia? Try These Alternatives
If ammonia isn’t your thing, there are other options that still work well using the same “bag” principle.
- Baking Soda and Vinegar (Gentler Option)
This method is less aggressive but more eco-friendly.
How it works:
Place the rack in a bag or bathtub lined with plastic.
Sprinkle baking soda generously over the rack.
Spray or pour vinegar over the baking soda.
Seal and let sit for 12–24 hours.
This method requires slightly more wiping afterward, but still far less scrubbing than traditional methods.
- Dish Soap and Dryer Sheets
This popular hack uses the softening properties of dryer sheets.
Steps:
Place the rack in a bag or bathtub.
Add hot water, a squirt of dish soap, and 2–3 dryer sheets.
Seal or cover and let soak overnight.
Dryer sheets help loosen grease, making residue easier to wipe away.
- Commercial Oven Cleaner in a Bag
If you prefer a ready-made solution, oven cleaner spray works extremely well in a sealed bag.
Tip: Always follow product safety instructions and wear gloves.
Common Mistakes to Avoid
Even simple hacks can go wrong if done incorrectly. Here are some pitfalls to watch out for:
- Mixing Ammonia with Other Cleaners
Never mix ammonia with bleach or vinegar. This can create toxic fumes.
- Using Thin Bags
Cheap or thin plastic bags may leak or tear, creating a mess—or worse, exposing you to fumes.
- Not Ventilating Properly
Always work in a ventilated area when using strong cleaners.
- Rushing the Process
This method relies on time. Cutting the soak short reduces effectiveness.
Is This Method Safe for All Oven Racks?
In most cases, yes—but there are exceptions.
Safe For:
Standard chrome or stainless steel oven racks
Heavily soiled racks
Older racks with baked-on grime
Use Caution With:
Racks with special coatings
Antique or specialty ovens
If in doubt, test the method on a small section first.
How Often Should You Clean Oven Racks?
Ideally, oven racks should be deep-cleaned every 3–6 months, depending on how often you use your oven.
Signs it’s time to clean:
Smoke when the oven heats
Visible black buildup
Sticky or rough texture
Regular maintenance prevents extreme buildup and makes future cleaning even easier.
Why This Hack Is Better Than Scrubbing
Let’s compare.
Traditional Scrubbing:
Takes 1–2 hours
Requires physical effort
Often damages the rack
Leaves grime behind
Bag Method:
Takes 5 minutes of setup
Zero scrubbing
Preserves the rack
Delivers near-new results
The difference is night and day.
The Psychological Benefit: Less Dread, More Control
Cleaning isn’t just about results—it’s about how it makes you feel.
Knowing you can clean oven racks without pain or frustration removes a mental barrier. Tasks that once felt overwhelming suddenly become manageable. This small win often leads to better overall home maintenance.
Frequently Asked Questions
Will my kitchen smell like ammonia?
No, as long as the bag is sealed and you work in a ventilated area.
Can I reuse the ammonia?
It’s best to discard it safely after use.
Does this work on grill grates?
For Complete Cooking STEPS Please Head On Over To Next Page Or Open button (>) and don’t forget to SHARE with your Facebook friends
ADVERTISEMENT
