ADVERTISEMENT
The Ingenious Trick for Cleaning the Washing Machine Drawer: As Good as New and Mold-Free!
Washing machines are the unsung heroes of every household. They take on the never-ending cycle of laundry, from smelly gym socks to delicate silk blouses, making our lives infinitely easier. Yet, despite their importance, many people overlook a crucial part of maintaining their washing machine: the detergent drawer.
It’s easy to ignore because it seems innocuous, but over time, the washing machine drawer can become a breeding ground for mold, mildew, detergent residue, and bacteria. Not only does this affect the hygiene of your laundry, but it can also shorten the lifespan of your machine and even emit unpleasant odors.
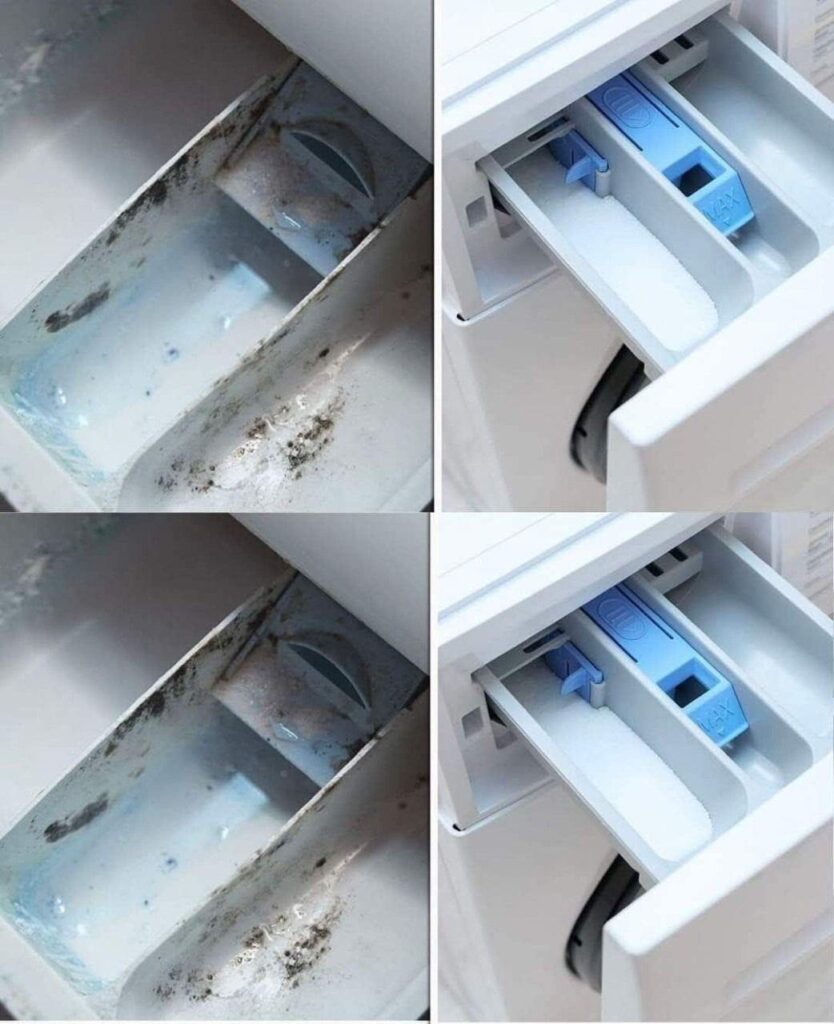
If your washing machine drawer is looking grimy or moldy, don’t panic. There’s an ingenious trick that can make it as good as new, mold-free, and ready for countless laundry loads. In this article, we’ll explore everything you need to know about cleaning your washing machine drawer effectively, safely, and efficiently.
Why the Washing Machine Drawer Gets Dirty
Before diving into the cleaning process, it’s helpful to understand why washing machine drawers get so dirty in the first place.
- Residual Detergent and Fabric Softener
When you pour detergent or softener into the drawer, some of it inevitably sticks to the sides. Over time, this residue builds up, especially in machines that use liquid detergents, which tend to leave behind a sticky film.
- Moisture Retention
The detergent drawer is a moist environment, especially if the machine is used frequently. Moisture creates the perfect breeding ground for mold and mildew, particularly in areas that are hard to reach or dry slowly.
- Warm Temperatures
Washing machines heat up during cycles, and warmth plus moisture equals the ideal environment for bacteria and mold growth.
- Infrequent Cleaning
Many people clean their washing machines occasionally but forget about the drawer. The hidden corners and grooves make it a prime spot for dirt to accumulate unnoticed.
Signs Your Washing Machine Drawer Needs Cleaning
Knowing when to clean your washing machine drawer is just as important as knowing how. Here are some signs that your drawer is due for a thorough scrub:
A musty odor coming from the machine
Visible mold or black spots around the compartments
Detergent buildup that doesn’t rinse away during cycles
Laundry that doesn’t smell fresh, even after washing
Slow draining water or slight residue left in clothes
If you notice any of these signs, it’s time to roll up your sleeves and tackle the drawer.
The Ingenious Trick: Step-by-Step Guide
Here’s the secret to cleaning your washing machine drawer so effectively that it will look brand new.
What You’ll Need
White vinegar
Baking soda
Warm water
Old toothbrush or small cleaning brush
Microfiber cloth
Toothpick or cotton swab (optional, for tight corners)
These items are all natural, non-toxic, and safe for both your machine and the environment.
Step 1: Remove the Drawer
Most washing machine drawers can be removed completely. Look for a release lever or button on the drawer. Pull it gently while pressing the release, and the drawer should slide out completely.
Pro Tip: Consult your washing machine’s manual if you’re unsure how to remove the drawer safely. Some models have complex mechanisms that require careful handling.
Step 2: Soak the Drawer
Fill a basin or sink with warm water and add 1/2 cup of white vinegar. Submerge the drawer and let it soak for 15-30 minutes.
The vinegar helps:
Dissolve detergent residue
Kill mold and bacteria
Remove unpleasant odors
If the drawer is extremely grimy, sprinkle 1-2 tablespoons of baking soda into the water for extra cleaning power.
Step 3: Scrub Every Corner
After soaking, use an old toothbrush or small cleaning brush to scrub all surfaces, including compartments, edges, and grooves. Don’t forget hard-to-reach areas where mold likes to hide.
For stubborn buildup:
Make a paste with baking soda and a little water
Apply to the affected area
Scrub gently with the brush
Tip: Use a toothpick or cotton swab for tiny nooks.
Step 4: Rinse Thoroughly
Once the drawer is scrubbed clean, rinse it under running warm water until all detergent, vinegar, and baking soda residue is gone. Make sure the compartments are completely clear.
Step 5: Dry Completely
Before reinserting the drawer, dry it thoroughly with a microfiber cloth. Moisture is the enemy of mold, so this step is crucial. You can also let it air dry for 30 minutes for extra precaution.
Step 6: Clean the Drawer Slot
Don’t forget to clean the cavity where the drawer fits. Mold and detergent can accumulate here as well.
Dip the toothbrush in vinegar
Scrub inside the slot carefully
Wipe with a clean, damp cloth
Dry thoroughly
Step 7: Reinsert the Drawer
Once everything is dry, slide the drawer back into the machine. Test it by running a short wash cycle to ensure that the water flows correctly through the compartments.
Maintenance Tips to Keep the Drawer Mold-Free
Cleaning the drawer once is great, but keeping it mold-free requires consistent maintenance.
Leave the Drawer Open
After each laundry load, leave the drawer slightly open to allow airflow and prevent moisture buildup.
Use the Right Detergent Amount
Too much detergent creates excess residue, which encourages mold. Follow the manufacturer’s recommendations.
Regular Vinegar Wash
Run an empty cycle with 1 cup of white vinegar every month. This cleans the internal hoses and prevents mold buildup in the drawer.
Wipe the Drawer Weekly
Even a quick wipe-down with a cloth or sponge after each use helps maintain cleanliness.
Check for Mold Early
Inspect the drawer monthly. Catching mold early prevents it from spreading to the machine and your laundry.
Why Vinegar and Baking Soda Work So Well
The combination of vinegar and baking soda isn’t just a household myth; it’s science.
Vinegar (Acetic Acid): Dissolves soap scum, kills mold, and neutralizes odors.
Baking Soda (Sodium Bicarbonate): Gently scrubs residue, deodorizes, and helps vinegar penetrate tough grime.
Together, they create a safe, effective cleaning solution without harsh chemicals, which is especially important for washing machines that handle our clothes and bedding.
Additional Tricks for Stubborn Mold
If mold persists even after a thorough cleaning, you can try:
Hydrogen Peroxide Spray: Apply 3% hydrogen peroxide to moldy areas, leave for 10 minutes, then scrub and rinse.
Bleach Solution (As Last Resort): Dilute bleach with water (1:10 ratio) and carefully scrub the affected areas. Avoid mixing with vinegar.
Commercial Washing Machine Cleaners: Use once in a while for heavy buildup. Follow the manufacturer’s instructions.
Always prioritize natural methods first; chemical cleaners can damage the machine over time.
Benefits of a Clean Washing Machine Drawer
Cleaning your washing machine drawer isn’t just about aesthetics. The benefits are tangible and long-lasting:
Hygienic Laundry – No more musty smells or mold spores transferring to your clothes.
Efficient Washing – Detergent flows freely, so your laundry comes out cleaner.
Longer Machine Life – Regular maintenance reduces wear and tear on internal parts.
Reduced Odors – A clean drawer prevents the buildup of mildew and bacteria.
Peace of Mind – Knowing your laundry is clean and safe gives everyday satisfaction.
Common Mistakes to Avoid
Even with a clear guide, people sometimes make mistakes that reduce effectiveness:
Skipping the drying step – A damp drawer is a mold magnet.
Using too much detergent or fabric softener – Residue builds up faster than you realize.
Ignoring the drawer slot – Mold grows in hidden corners as well.
Delaying cleaning – The longer you wait, the more stubborn the buildup becomes.
Avoid these pitfalls, and your drawer will stay clean for months.
When to Call a Professional
In rare cases, mold or buildup may extend into the internal hoses or drum, beyond the reach of manual cleaning. Signs include:
Persistent foul odor despite cleaning
For Complete Cooking STEPS Please Head On Over To Next Page Or Open button (>) and don’t forget to SHARE with your Facebook friends
ADVERTISEMENT
